 This watermelon 'rose' was carved with a simple fruit knife. It could have been more fine but the watermelon skin was too thin and rubbery so I couldn't make accurate thin cuts.
Very fast!! Done in 15 minutes.
This watermelon 'rose' was carved with a simple fruit knife. It could have been more fine but the watermelon skin was too thin and rubbery so I couldn't make accurate thin cuts.
Very fast!! Done in 15 minutes.
Tuesday, August 24, 2010
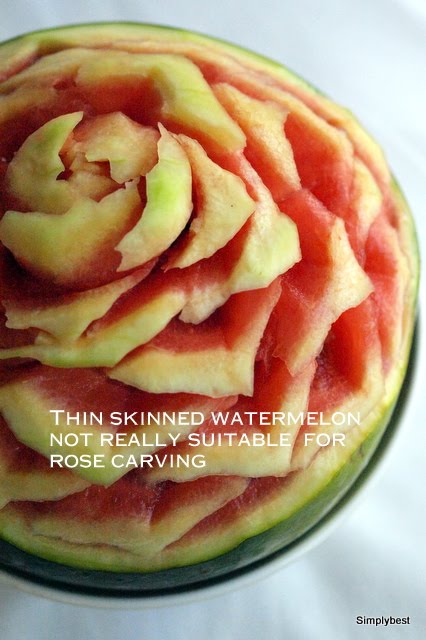
Watermelon rose
This watermelon 'rose' was carved with a simple fruit knife. It could have been more fine but the watermelon skin was too thin and rubbery so I couldn't make accurate thin cuts.
Very fast!! Done in 15 minutes.
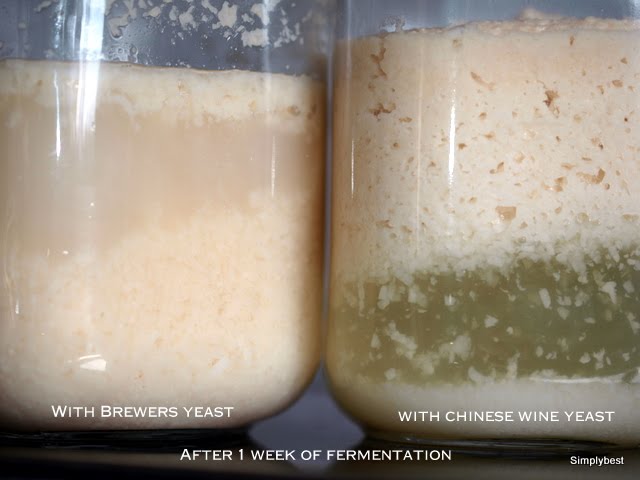
Rice Wine (homemade), part 2


The experiment with Brewers Yeast was not successful. It was sour without any trace or taste of alcohol :-(
Sunday, August 22, 2010
Drunken chicken (with homemade Huang Jiu)

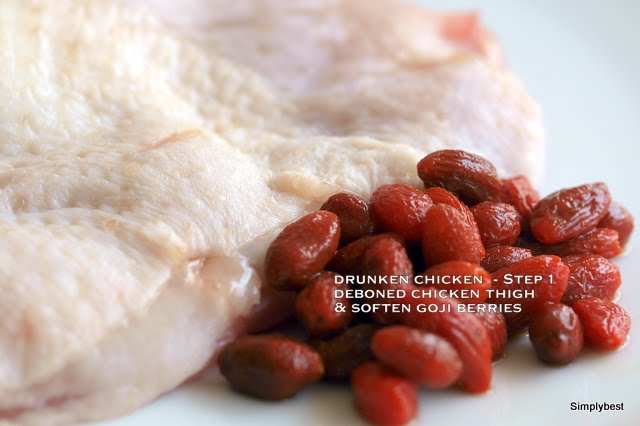


- 2 chicken thighs (deboned)
- A handful goji berries/wolfberries
- salt + pepper
- 1 cup homemade rice wine
- 1 tsp shaoxing wine
- Optional: 4 slices dong guai or ginseng, red dates, or dried longan.
- Trim excess skin. Place chicken thigh, skin down and sprinkle with salt and pepper. Spread goji berries/woldberries evenly over meat and roll up. Bind with string.
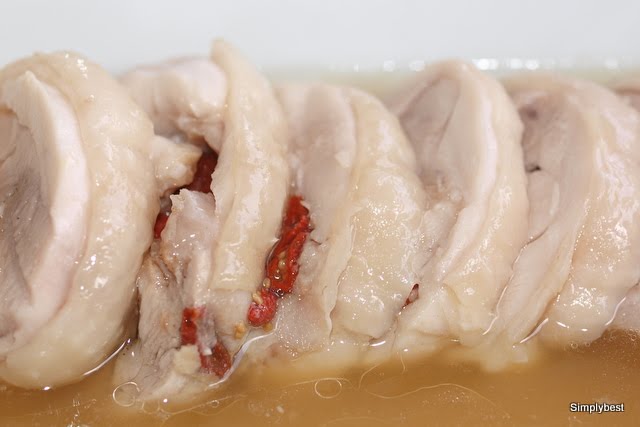
- Place rolled chicken in a deep dish and steam at medium heat for 30 minutes or until cooked. (Add optional ingredients to steam at this stage.) You may stick a skewer into meat, if no pink liquid flows out, it is cooked.
- Lift chicken out of dish and let cool. IMPORTANT - DO NOT DISCARD LIQUID/CHICKEN STOCK COLLECTED AT BOTTOM OF DISH.
- When chicken is cooled, remove strings and with a very sharp knife, cut into 2cm thick slices.
- Arrange chicken slices in a deep dish.
- Add rice wine and shaoxing to CHICKEN STOCK.
- Pour liquid over chicken slices.
- Cover dish with cling film and place dish in the refrigerator to chill for at least 24 hours.
- Serve cold with dijon mustard as dip.
Saturday, August 21, 2010
Oyster Mushrooms with sugar peas & red bell pepper

It has been raining 'cats and dogs' on otherwise warm and sunny days. Which means mushroom weather as mushrooms do well in warm dampnes. Will have to wait another 3 warm days then it's mushroom hunting time.
Meanwhile, I have bought some oyster mushrooms. This is another of my all-time favourite dishes. Very quick to prepare and perfect to be served with steamed rice.
Oyster Mushrooms with sugar peas & red bell pepper
Ingredients
- 300gm oyster mushrooms (clean and cut into bite size )
- 1 red bell pepper, diced/cubed
- 200gm snow peas, rinse and pick ends
- 1 pip garlic, minced
- 2 tbsp light soy sauce or oyster sauce
- 1/2 tsp sugar
- 2-3 tbsp oil for frying
Method
- Heat the oil in a preheated wok or shallow pan on medium-high.
- When the oil is hot, add the minced chopped garlic.
- Stir-fry briefly until it is aromatic, then add the snow peas and red pepper.
- Stir-fry briefly, then add mushroom.
- Then flavour with soya sauce and sugar.
- Stir until all well combined. Remove and serve.
Note: Total stir-frying time for this dish about 2 minutes.
Tuesday, August 17, 2010
Bunny Chow

The first time I heard of this was from a South African who came to visit. He described his way of eating this 'Bunny', you'd think he was spending a night with a Playboy Bunny....."First you dip into the juicy centre, then when the juice overflow, you just lick around the sides..." OK Stop that dirty mind!
There appears to be some confusion. Neither rabbits are involved.
It's a white bread. A half loaf of sandwich or if you're very hungry, l whole sandwich loaf - hollowed out and filled with hot-like-hell curry. It was originally strictly vegetarian but these days, you can get it with lamb and chicken. It's a popular takeaway can be purchased at nearly any Indian eatery in Durban. I was told it is also available elsewhere in South Africa but I've not seen in places I went to, like Jo'burg and Cape Town.
It appears that the Indian golf caddies weren't given a decent lunch break, so they had friends bring them curry in the most convenient edible container available. Another story goes that Indians working in the cane fields in KwaZulu-Natal (the job for which their immigration was originally encouraged) would have lunch brought to them in this form. Hence, Bunny Chow is a humble working-class dish. Whatever the truth is, Durban has the largest Indian community outside of India.
Bunny Chow is one of those Indian dishes that has never seen the shores of India.
Here is the vegetarian filling...
Lentil Curry
Ingredients
- 150 gm red lentils
- 1 tbsp garam masala (too lazy to make my own so I had a friend to bring me a pack from India)
- 1 large or 2 small onions (chopped)
- 3 tbsp sunflower/corn oil
- 1 tsp chilli powder (optional)
- 1/2 tsp kukurma
- 1 can chopped tomatoes (or 3-4 fresh ones, chopped)
- 2 slices of fresh ginger
- 2 cloves garlic (chopped)
- salt
Method
- Heat up oil in a deep pan at medium.
- Add onions and fry till it's soft (glassig). It takes about 5 minutes.
- Add garam masala to onions and stir for about 30 seconds.
- Add kukurma and chilli powder, mix them into the masala (about 30seconds)
- Add tomatoes, stir another 30 seconds.
- Add lentils, ginger and garlic.
- Cover and simmer gently, stirring occasionally, till soft.
- Add salt to taste
To serve, cut a sandwich load into half. Remove the centre/scoop out the centre and just load in the lentils till it's flowing over.
I couldn't find a whole sandwich loaf from my bakery so I simply got a bun. Another alternative is to serve with chapati.
Tastes best when eaten with fingers.
Monday, August 16, 2010
Rice Wine (Homemade)... aka Huang Jiu
Not too sure if it's the same with chinese in other parts of the world but I have seen my grandmother "brew" her own rice wine.
She usually start when one of my aunts or relatives gets pregnant. She will steam the rice in a huge bamboo basket and then the rice would have to be cooled before wine yeast is added, then the mixture would be carefully loaded into a huge earthen 'jug'. This jug (with a volume of at least 50 litres) will then be hidden in a dark corner of the house.
The following week or two, I usually smell the sweet fermentation around the whole house. It was illegal then to brew your own 'alcohol'. Imagine the tension !!
By the time the female relative gives birth, the wine would be ready as well. The new mother will get to eat chicken cooked in this wine the next 30 days, for lunch and dinner. It's suppose to be healthy.
I have made several attempts to make this but it always ended up in failure due to one reason or another. Was discussing about it with Lily and Peng and we decided to give it a go.
This will be my umpteenth attempt... keeping fingers crossed !!
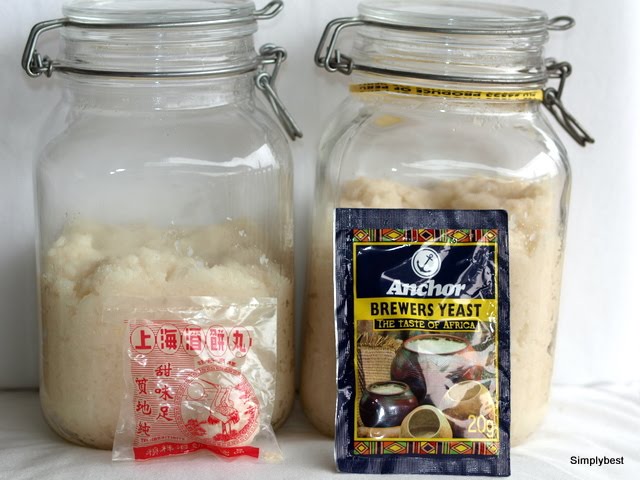
When I was in J'burg, South Africa I picked up a pack of Brewers Yeast which the locals use to concoct their own brew. Grains or old breads were used to brew so I use rice.
Ingredients
- 500 gm glutinuous rice
- 1 pc (marble) wine yeast.........(second version) 1 tsp brewers yeast
- 1 tbsp brown sugar
- 1 cup water (optional)
Method
- Wash and soak glutinuous rice in water overnight.
- Next day cook rice as you would with long grain rice in an electric rice cooker.
- When done, tilt the rice cooker cover slightly to release moisture.
- Let rice cool to room temperature.... Do not be impatient, really coooool the rice.
- Grind the yeast 'marble' into powder. (This step is not necessary when using brewers yeast)
- Spread the cooled rice on a plate or a shallow wide pan and sprinkle the yeast over the rice as evenly as possible.
- If the rice is too dry, sprinkle a bit of water over the rice and mix thoroughly.
- Store rice/yeast mixture in a deep glass/porcelain jug with cover.
- It does not have to be air-tight as the fermentation starts, it has to 'breath'.
- Place jug in a warm dark place and let the yeast do its work.
- Now just have to wait 4 weeks.
Saturday, August 14, 2010
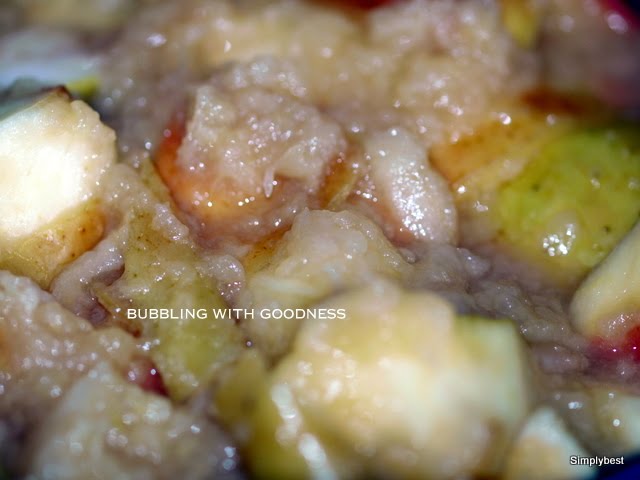
Apple Sauce (Apfel-Kompott)

Almost every week, I would go to the fresh market to pick up 4-5 kgs of apples. It doesn’t matter which variety. It’s usually a mixture of Jonah Gold, Fuji, Elster which are grown in our region. Each morning I would throw 2 or 3 apples plus 5-6 sticks of carrots into the juicer and Voila!, my vitamine fix for the day... I intend to live well over hundred.
Today, I realised soon it would be apple season and I still have 5 kgs of apples from last year. Decided to turn them into apple sauce as I have a longing for a special pasta dish served with apple sauce. I'm not kidding - Pasta with apple sauce!! I'm sure KP is longing for this too :-D
But first, the apple sauce.
Absolutely simple and straight forward:
Ingredients
- 4 kg apples (any sort of apples)
- Juice from 1 lemon to prevent browning.
- Sugar to your taste (optional)
Method
I did not add any sugar into mine. But if you're using fall apples, you might need some.
- Wash, slice/chop up your apples into 4-6 piece chunks.
- Remove any brown spots or anything you don’t want in your apple sauce.
- Leave everything else on.
- Read here http://www.penningsorchard.com/benefits.html.
- Place in a deep pan.
- Add a stick of cinnamon if you like.
- Add 1 lemon juice to preserve the colour and ½ cup of water to kickstart the cooking process...
- Turn on heat low and cook. Stir occasionally. It may take 30 minutes or longer, depending on the amount/volume of apples you have.
- Once the apples turn mushy, it is ready.
- Work the sauce with a food mill (Flotto Lotto) to remove the skin.
- I simply fish them out with a fork as I like mine a bit chunky.
- Return the sauce into the pan.
- Add sugar if you wish.
- Cook again at medium temperature.
- When it starts to bubble, turn off heat and pour sauce into twist-off glass jars and seal.
- Immediately set the jars upside down for 15 minutes.
- Once it is cooled, it will be air-tight.
- If there is no vacuum, the sauce should be consumed within a week.
- Store the jars in a cool dark place.
Friday, August 13, 2010
From my Garden in August
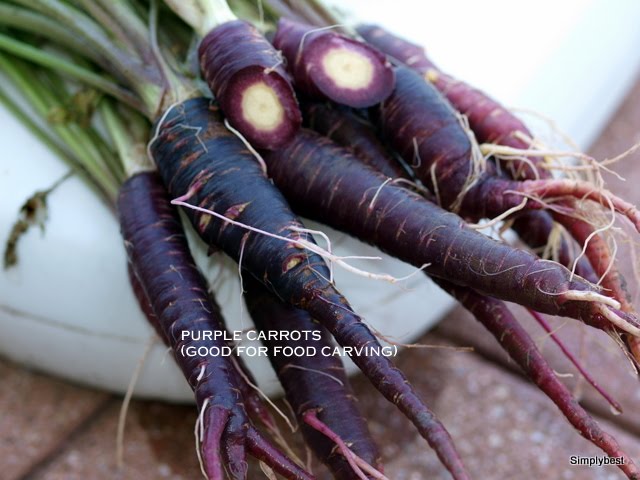
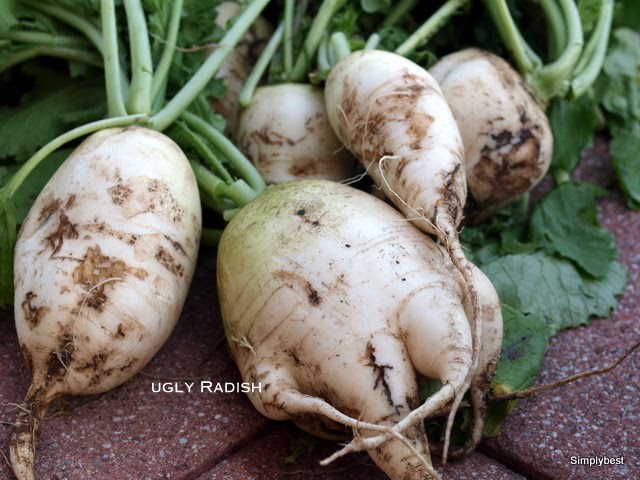
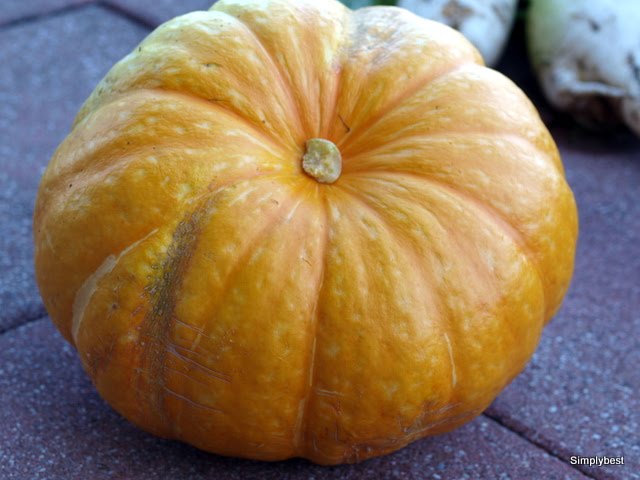
Extreme weather results.
Skinny purple carrots, hollow 3-legged radish and funny shaped pumpkin...
Food Carving
 When I'm under stress or have a restless mind, the world may seem hostile. Over the years, I have turned to/discovered some ways to 'chill out' as my son like to say. One of my 'chill out' method to achieve deep peace, quiet mind and new strength to resecure the balance with my emotions is FOOD CARVING. It took me more than hour to finish this piece and I must admit, pretty satisfied with the result. Peace !!
Thursday, August 12, 2010
Basic Homesick Food

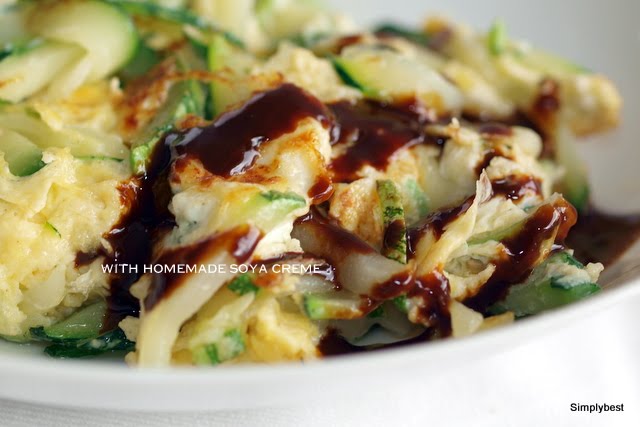

Anyone who lives outside of their homeland will at some point feel homesick for familiar tastes and smells. This feeling of nostalgia hit me this morning when I picked a corgette from my garden.
A very basic dish without much preparation. Suitable for people who are 'spice shy'. Dress it up with chilli sauce, soya sauce, ketchup or even with a sprinkle of garam masala, it becomes a multiculture dish.
Ingredients
- 300-400 gm corgette (sliced into sticks)
- 3-4 eggs (whisked)
- 2 pips of garlic
- 3 tbsp cooking oil
- 1 1tsp salt or 1tsp chicken broth powder
- 1 fresh milled pepper
Method
- Heat up a pan (preferably non-stick), add oil into pan when it is hot. Once it starts to smoke (yes!! smoke!): add garlic.
- Stir garlic till it starts to brown. Add corgette and stir-fry for 1-2 minutes.
- Add salt or chicken broth powder. Pour whisked eggs over the whole surface of corgette and let the egg cook.
- Do not stir. It will only take about 30 seconds (if the flame is high).
- Flip the 'omelette' over, try not to break it up.
I was not successful with mine... ;-( - Cook for another 30 seconds. Done. Serve warm.
Wednesday, August 11, 2010
Annual Water Festi-/Carnival in Ulm - July

This is an annual festival in summer. It happens in Ulm, mostly on the Danube river.

Thousands of people are floating down the river.

Everybody having lots of fun. Dozens of fully-manned brass and marching bands participate.

It's like a carnival on water.

People bring their home-made rafts, struggling not to capsize.

All the while, everybody splashes the next guy or gal. But only if you are on the water...

Splashing spectators is strictly forbidden
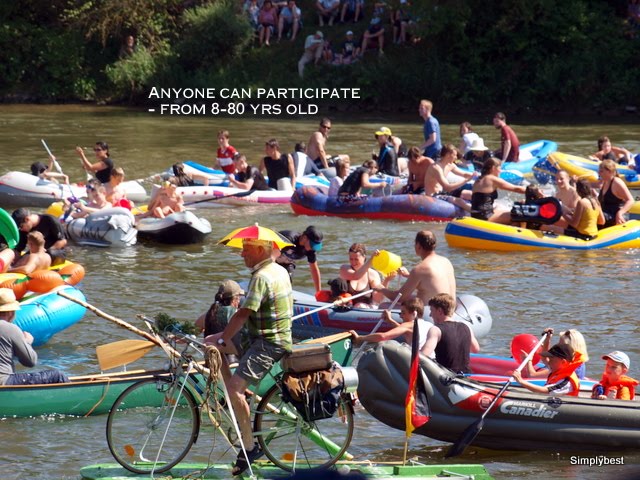
Thousands of boats and thousands of spectators lining the river banks.
Tuesday, August 10, 2010
Black Currant and Cranberry Cake (Glutenfree)
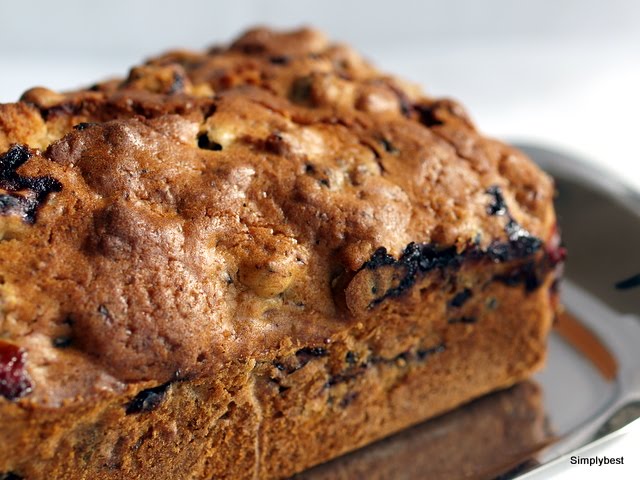
Yummie, yummie...
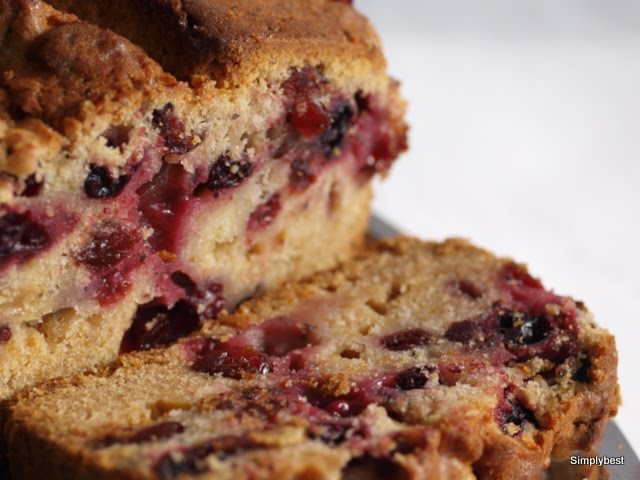
Found this receipe in an 'Organic' magazine. What caught my attention was this cake was using YEAST instead of baking powder.
I have some dried cranberries, fresh black currants and a bag of glutenfree flour. And of course, other basic baking ingredients like eggs and butter which I always have.
Ingredients
- 150 gm butter
- 150 gm brown sugar
- 4 eggs (small)
- 180 gm glutenfree flour
- 1 pack yeast
- 1 pinch of salt
- 200 gm fresh black currants
- 50 gm dried cranberries
Method
- Cream butter with sugar and salt.
- Whisk eggs and slowly add into butter cream.
- Sieve yeast and flour together and fold into batter. At this stage, I let the batter 'rest' for 20 minutes to give the yeast a chance to proof. Meanwhile, preheat oven at 220°C.
- Line a loaf pan with baking paper to prevent cake from sticking.
- Dust black currants and cranberries with 2 tbsp flour.
- Carefully fold the berries into the batter.
- Fill batter into pan and 'proof' another 5-10 minutes. Bake 15 minutes at 220°C. Reduce temperature down to 180°C and bake further 20 minutes or until brown.
- Remove cake from loaf pan but do not remove baking paper and let cool.
- Once cooled, remove baking paper and dust over with icing sugar.
Conclusion
The cake did not raise as high as a yeast dough should. No taste of yeast is detected in the cake.
That means, an alternative raising agent like baking powder or cream of tartar (Weinsteinpulver) is acceptable.
As there was no vanilla essence added, the aroma of black currants and cranberries were quite prominent - tangy and fruity. Perfect for people with gluten allergy or celiac disease.
Monday, August 9, 2010
Savoury Couscous Muffins


Here comes one of my greatest 'hits'. It's become a very popular fingerfood around here, since I introduced it. I'm always asked by friends to bring along a basket full for their parties.
Ingredients
- 1 large onion chopped
- 50-75 gm butter
- 100 gm cubed smoked ham
- 250 gm cooked couscous
- 5-6 pcs dried tomatoes(chopped)
- 200 gm schredded cheese (Emmentaler)
- 1 tsp natron or baking powder sieved into 100 gm all purpose flour
- 5 eggs
Method
Melt butter in pan.
Add chopped onions and ham.
Fry on medium for 5 minutes.
Set aside to cool.
Preheat oven to 200°C.
Mix gently tomatoes, flour with natro/baking powder and cheese to couscous.
Add cooked onions with ham.
Whisk eggs till foamy and gently fold into mixture.
Fill 3/4 full into muffin pan and bake for 20-25 minutes.
Serve warm with creme fraiche or sour cream.
Sunday, August 8, 2010
Kaya Classic
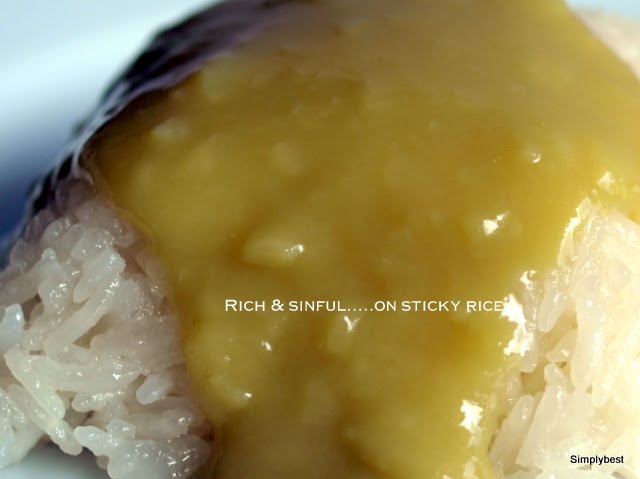
Kaya classic

Rich and sinful... on sticky rise...
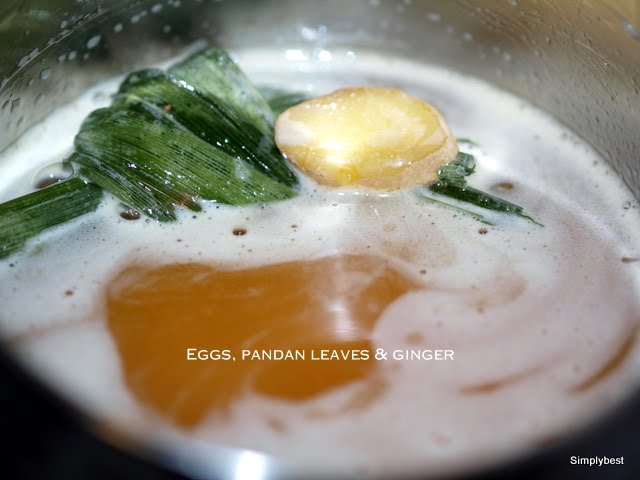
Eggs, pandan leafs and ginger...
Call it coconut jam or coconut custard for better western understanding.
Despite the many various colours/shades of green kayas seen over the years, I've never diverted from the basic old fashion receipe. So my kaya is still caramel brown, free of artificial colours and aroma.
Been making kaya over the years for family and friends but have never bothered to write it down. Guess it's time to share........
Ingredients:
- 10 eggs (large)
- 250 gm sugar (generally it's 1 heap tbsp per egg)
- 1 pinch of salt
- 2-3 screwpine leaves (pandan)
- 1000 ml (1 ltr UHT pack)
- coconut milk [*]
- 2-3 slices fresh ginger
- xtra 3 tbsp of sugar for caramel
([*] Note: I placed the coconut milk in the refrigerator for 2 hours so that cream is hardened and water is separated. Discard water)
Method:
Heat 3 tablespoons of sugar in a pan till sugar caramalises to a dark brown colour but not burnt.
Remove from heat and slowly/carefully add coconut cream. Return to heat, stir till caramel is dissolved.
Set aside.
This method is new and much more simple - thanks to Lily.
Place eggs, sugar and salt in a deep pan.
Stir or use whisk to mix till sugar is dissolved.
I used a plunger (stabmixer).
Tie pandan leaves into a knot and ginger slices into mixture.
Place pan in double boiler and stir slowly, scrappng the bottom of pan.
When mixture is warm or after approximately 10 minutes, add coconut caramel. Keep stirring.
Kaya is done when the mixture starts thicken. It should take another 10 minutes. Do not overcook the kaya to grainy texture. Remove from bath.
Remove pandan leaves and ginger slices.
Serve.
How to eat kaya?
- On breads or better, on buttered toast.
- As TV snacks on crackers.
- With steamed glutinuous rice.
Some people make kaya in the microwave and some with breadmaker. Experiment if you want but I stick to my classic method.
Thursday, August 5, 2010
Fields of gold - Barley


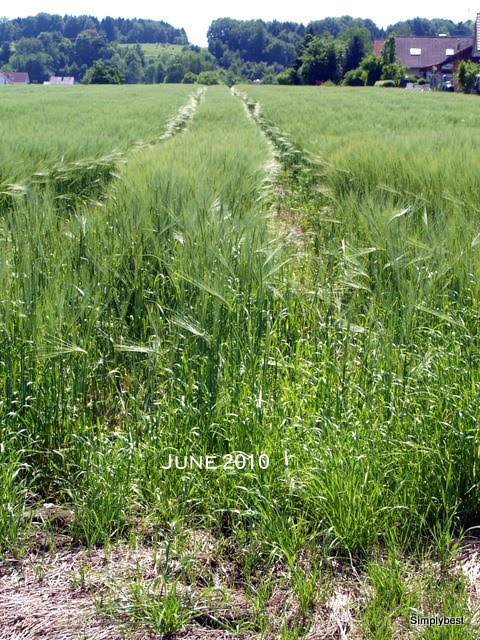

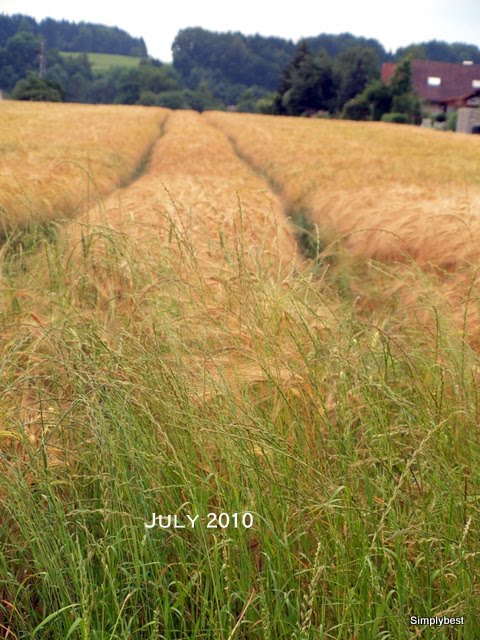
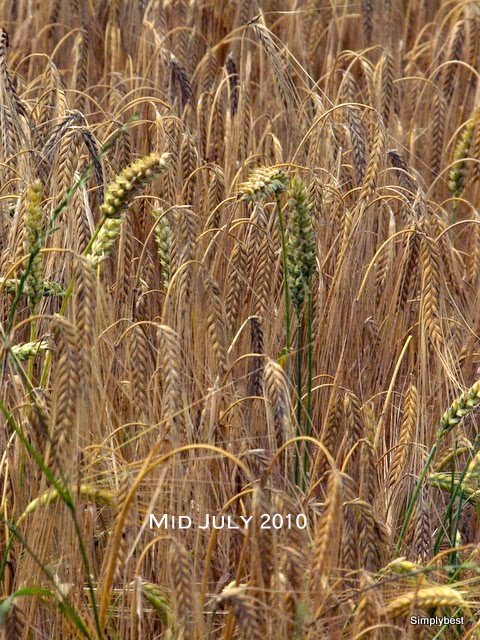

The grains were sowed in winter last year. This is the result by end of July 2010.
Vanilla Essence (part 2)

Vanilla Sticks in Vodka
Remember my post from January 18th? I described how I started to brew up my vanilla essence, using a bottle of vodka and a few sticks of vanilla.
It's almost empty. I forgot to show the results. The aroma is WOW !! Hmmm...maybe I should take a holiday in the Mauritius, come back with a suitcase full of vanilla pods.
Here's a picture how it looks now.
The Black Forest


Those who have toured Germany know: the Black Forest is one of the 'must see'. Here are some photos to revive your memories.
(Click picture for bigger version.)
Subscribe to:
Posts (Atom)